
Every Welburn Gourd is naturally grown, making each one unique. We grade our gourds based on structural integrity and workable surface. Not shell color.
Premium Quality
- 90–99.5% workable surface
- Minimal natural growing characteristics
- Little preparation required
Standard Quality
- More natural character
- Same sturdy shells
- Great for artists comfortable with a little extra prep
Orders are processed within 5-7 business days before shipping.
We ship orders Tuesday through Friday only. Orders are not shipped on weekends or holidays.
Gourd orders are carefully hand-selected, cleaned, and packed to ensure you receive the best quality possible.
You'll receive a shipping confirmation email with tracking information as soon as your order is on its way.
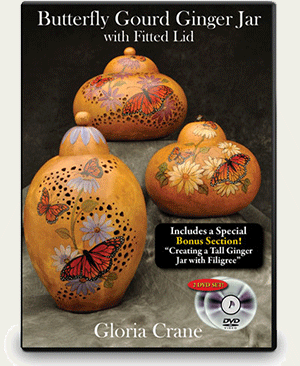
Butterfly Gourd Ginger Jar With Fitted Lid By Gloria Crane

This class includes the full Canteen Gourd Ginger Jar project, PLUS over 2 hours of additional bonus material, including steps for creating the tall ginger jar with filigree carving and Gloria's special "faux filigree" technique! This would normally be a 2-day class and sell for $150.00 if taught live!
This video is packed from start to finish with so much valuable information you’ll want to watch it again and again!
In this incredible 2-DVD set (including over 2 hours of bonus material!) you will discover:
- How to create a fitted lid that "locks" into place (see top photo at left)
- How to make your design line up perfectly on the lid and the base (see second photo at left)
- An amazing way to cut your gourd using your Pro Carver instead of a mini saw!
- The fast and easy way to grind down stem stumps (see third photo at left)
- How to find the exact center of your gourd so your lid lines up perfectly in the middle EVERY TIME (and why it’s a bad idea to use the stem area as your center!)
- How to cut and create a lid that will fit your gourd
- Why you'll want to wait to make the topper for your lid until AFTER you've done all your carving and wood burning
- Great tips on tool use, including how to keep your saw blades from breaking, how to make your wood burning pens last 5 years or more, how to keep your burr from "jumping" while you carve, and more!
- What you MUST remember to do before you start carving, otherwise you won't get your lid to fit correctly
- The best carving burrs to use for carving down the lid area
- Why your lid might not fit right even though you followed all the carving steps perfectly, and the one quick fix that will make it fit!
- Special tricks for pattern placement
- A quick and easy way to draw your own flowers and leaves if you decide to add to your design
- The three Wood burning pens you need in order to wood burn the butterfly design and why they are the best ones to use
- An easy trick for removing Stick 'n Burn to avoid leaving sticky residue on your gourd
- Simple wood burning techniques to make your flowers and butterflies look more realistic.
- The #1 mistake people make when using Ink Dyes and how to avoid it.
- Why you want to have several shades of each Ink Dye color on hand when coloring your design
- The secret to creating butterflies with bold, realistic looking colors (Hint: it's not just about the Ink Dye color choices but HOW you put them on!)
- Why you want to seal your gourd with varnish BEFORE you complete your butterflies
- Welburn Gourd Farm Special tips for painting the flowers (Includes 3 different color options for your flowers; white, purple, and blue!)
- How to create an "inverted gourd" with a flat wooden bottom
- The important step you must do before cutting out your wooden base
- The right and wrong way to hold your burr when doing filigree carving
- Why it's important to varnish your gourd BEFORE you do the filigree carving
- Gloria's special trick for creating "faux filigree" (same as regular filigree but you don't have to carve all the way through the gourd!)
- How to finish your filigree holes to give your art piece a more professional look
- How to attach a bead to your lid
- How to create a lid with a special jewelry gourd top
- How to make the adorable 3-D flower design lid, including tips for woodburning the flower stamens onto the jewelry gourd top (see photo at left)
- Additional information on how Gloria made other gourd ginger jars (see photo at left)
- And much, much more!
Plus you get the pattern FREE! A link to download the pattern from our website is included on the face of your DVD!

If you would like your pattern pre-printed, be sure to pick up the Stick 'n Burn pack with has 2 extra pages added for just $9.95!
People Also Bought
Here’s some of our most similar products people are buying. Click to discover trending style.